
ACC100:
LMS & Multimedia
This section will discuss Penn State's internal LMS system and how to make a course expirience more accessible in that system. It will also cover some different types of multimedia and how they can be made accessible.
This topic will also show you the steps that need to be taken to create accessible multimedia elements such as video and presentations for your courses. We want to create a basic understanding of these steps so that you know where to go for help and so that the process of creating accessible multimedia materials can be smoother. You should be able to identify which elements we will need to create accessible multimedia materials and to better facilitate the conversation between the faculty and Multimedia Specialists after reading this section.
Angel Accessibility
Angel Email
Known Issues
1. JAWS/Voiceover screen reader verbally identifies the text input box for both the ‘Subject’ and ‘Message’ fields as only “Text Input” which doesn’t properly identify either and makes it impossible to discern one input box from the other.
2. Navigation can be inconsistent and tricky. This involves the issue with the message input area that you must TAB past and then SHIFT+TAB back into. The other way to do it is to use the form list function in JAWS but not all Screen Reader users use this function and all of the input fields must be properly labeled for it to be useful.
Recommendation: Use an outside email client. This allows the user to utilize the client they are most familiar with for all course communications.
Angel Live (Chat)
Known Issue
3. Angel Live chat does not allow a screen reader to read the main display window. A screen reader will access and read the message input area however all content including the user’s submitted message and other individuals messages/responses that display in the main chat window can not be read by the screen reader.
Recommendation: For users with assistive technologies, other means of text chat based communications such as MSN Messenger (JAWS has specific scripts to work with MSN Messenger) are more accessible options. AOL Instant Messenger client and Yahoo are unusable with a screen reader.
Angel Discussion Forum
Known Issues
4. When using TAB to navigate through to select a post to read, the tab cursor will become stuck once entering the main discussion content area. The reason is that the cursor immediately lands on the expand/collapse switch and the system changes the functionality of the TAB key to toggle that switch rather than to continue to TAB through to other items.
5. (Same as with email) To enter the Message input box when creating a new post or a response, you must tab past it then use Shift + Tab to reverse tab into it. *note: Need to try turning off the HTML editor to see if this will take care of the issue. (This is still true however, a screen reader user would not be able to reach this part because of item #4)
6. Once the cursor reaches the directions portion of the window, it can become stuck within that portion. (This is still true however, a screen reader user would not be able to reach this part because of item #4)
7. How to navigate out of the message area without using the mouse cursor to click out of it is unknown at this time. (This is still true however, a screen reader user would not be able to reach this part because of item #4)
8. Both View and Quick Navigation menu are dropdown style boxes and can present issues to users with a screen reader. Users must select the dropdown box, which does not give a clear indication of the type of choices that it contains. Selection then occurs by using the up/down or left/right arrows. Once a selection is chosen, it will be applied upon pressing enter or navigating away with the tab key.
9. Responses to posts are visually organized by indenting the responses to previous posts slightly. There is no clear verbal representation of this when using a screen reader (this is still true however, a screen reader user would not be able to reach this part because of item #4).
Recommendation: Unknown
Angel Drop-box
Known Issues
10. JAWS/Voiceover screen reader verbally identifies the text input box for both the ‘Title’ and ‘Additional Comments’ fields as only “Text Input”, which doesn’t properly identify either and makes it impossible to discern one input box from the other.
Recommendation: Users who rely on assistive technologies should be permitted to submit assignments via email from within their regular email client if they have trouble with the dropbox.
Angel Forms / Assessments (Instructor)
Known Issues
11. Multiple-choice based questions require that a user TAB into the multiple choice/radio button answer area to select an answer. The user must then tab out of the area in the case of the multiple choice type question because arrowing down will change the users answer. An issue with this is that users of screen readers will often use the arrow keys to read the content of the page and the TAB key simply to navigate the page. When the user TABs out of an answer area, they will be taken to the next answer area, skipping the question itself. To get to the question, the user will have to TAB out of the answer area from the question they just answered, into the next answer area, and then arrow up to that answer area’s question.
Recommendation: Create a separate copy of the exam with access restricted to a team that you place the student in question in. Be sure to link the exam to the grade book and check the box labeled “Question at a time” under the Interaction tab in the quiz/assessment settings.
12. Including a timer that is not fixed in one position creates a few issues. One is that it interferes with the JAWS navigation, making the quizzes very difficult to navigate. Another issue is on a cognitive level. The timer can become a constant distraction and create anxiety within a test taker. Depending on the length of a question and the size of the window or screen resolution, the timer will often cover quiz/test questions.
Angel Layout / General Navigation
13. There is no “Skip to Content” option at the start of the page once inside a Course/Group. Users must tab through navigation links with every page refresh.
14. Users can change the layout within Angel to better accommodate their needs through some settings found within Angel. The user settings for some things, such as the theme, seem to be kept within the users access account so that regardless of the computer they view Angel on, it looks the same. Unfortunately, this is not true for the view settings. Settings such as the PDA layout and the 508 standards option are stored locally on the user's machine rather than in on the server. So if the user sets the profile up to have the PDA layout on their own machine then goes to a different machine, they will have to reset the profile choices for that computer. Also, after the user logs out, they will need to choose the Accessible View link again when they log back in unless it remains stored in a cookie file. This should be a profile setting similar to the Theme setting.
PDA Layout / Accessible View
15. A way to get a more accessible layout is to choose the Accessible View option found in the banner to the right side, or by choosing PDA layout found in the bottom left corner on the home screen just under the 508 button. Despite the different names, they actually perform the same basic function. Using either of these view options will remove the link feature to automatically redirect to the source. In some of the courses at the World Campus, we include a link to external course content that will automatically navigate the student to that content after a few seconds.
Basic Types of Multimedia Found in a Course
Audio
Video
Flash Applications
Transcription
When learning about things like best practices in respect to accessibility, it is commonly mentioned that if you are going to record a lecture, Podcast or anything containing only audio dialogue, then you should provide a transcript to accompany the recording. This can go beyond the topic of accessibility as well. There are several benefits to having a transcript created before even beginning the recording. Creating a transcript before recording is a good planning strategy. The speaker will be less likely to make mistakes when speaking and they will also be less likely to go off on tangents while forgetting to cover everything that is necessary. The common stalling words used when trying to think of the next thing to say such as the infamous "and" or "um" will be reduced when we have a pre-planned transcript to read from.
Once the recording is finished, the transcript can be offered as an alternate format, satisfying the needs of hearing impaired individuals. For everyone else it can act as a method of taking notes or even studying. If the transcript is not something that the creator wants to be made available until a request for it is filed, then they can simply store it somewhere until a request comes in. In the event that the transcript is needed, it will already be created, which will make the task of providing it fast and easy. It takes more time for a transcript to be created retroactively, than if it would have simply been done from the beginning. Another thing to consider is that students can request some accommodations just three days before they need them, and a higher educational institution would then be required to meet the request.
Creating Captioned Videos for the Web
No matter which method of including captions you choose, the best thing to do is to start by creating a transcript if one is not already provided. Producing the transcript first will allow easy conversion into a caption based file in most cases and it is also easily edited when changes need to be made. The transcript can then be posted along with the video to provide better equity.
After creating the transcript, you will want to break it down into small sections that can be displayed on the video screen. Avoiding breaking sentences up when possible will help maintain cognition. The meaning may become more difficult to determine when a sentence is not displayed all at once. After splitting the transcript into smaller portions, you will want to go back through the video and add the timestamps to the beginning of each portion. This can be done manually using any video player. I used QuickTime Player version 7.6 and opened the Movie Inspector by clicking Window in the toolbar the Movie Inspector in the dropdown menu. This allowed me to see a more precise time down to the hundredth of a second. I played the video while following along with the transcript, pausing at the start of each section and added in the time in the following format: hh:mm:ss.ss; hh being hours, mm being minutes, ss being seconds (the second ss denotes the time down to the hundredth of a second). An example of my transcript with the time stamps can be seen below in figure 1. In each section I am going to assume that a transcript has already been created before starting.
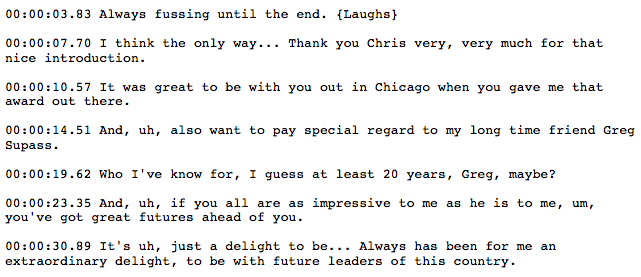
Figure 1: Transcript with Timestamps
Another way to do this is to use the MovCaptioner software and play the clips of the movie and copy and paste the transcript into the application in the appropriate chunks. The reason I choose not to use this method was so that I had more control over where the captions would split from screen to screen. The third option it to go through an outside provider such as AutomaticSync.
Captioning QuickTime Video
Captioning a QuickTime video will be the first type I cover. There are three basic ways to caption QuickTime video, which are to add the captions to the video (hard caption), use a SMIL file (soft caption), or add a closed-caption layer to the video.
Using a TXT file (hard caption)
To add open captions to a QuickTime video you need to create a TXT file of the captions. This is done by putting your transcript with timestamps into a text file. You then add code to the beginning of the file that will tell the QuickTime Player how to handle the text file. An example of this file can be seen below in figure 2.
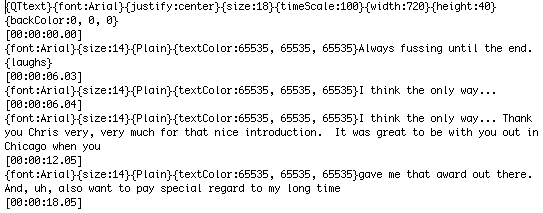
Figure 2: Caption text file for use with QuickTime
Once you have this file created you will have to open it with QuickTime Pro (as seen in figure 2.2) and merge it with the original video file. This process is fairly easy to complete and doesn’t require expensive software to achieve. If captioning is something that you will be doing often then you can keep a template text file so that you do not need to type in the beginning code each time.
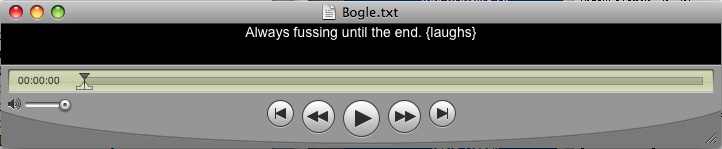
Figure 3: View of text file opened within QuickTime Player before merging.
Using a SMIL File (soft caption)
An alternative to merging the captions with the original video, you can create a SMIL file. A SMIL file is similar to a XML file with one specific purpose, to display captions. The SMIL file will combine the video with the captions as it is in use by simply telling the QuickTime Player, or browser plug-in, where both the video file and the caption file are located, and that it needs to combine them (see Figure 4). The files remain separate on the server side and you maintain your captions text file that may be edited or changed easily at any time. Still, this is not quite ideal, as you will get what would essentially be open captions. There is no button that will turn the captions on or off while watching the video. To get around this, you can create two separate links to view the video. One link would be to an html page with just the video imbedded. The other link would simply be directed to the SMIL file. Even this approach will not give you the ease of a button to turn the captions on or off. If you decide to view the captions a portion of the way through the video for any reason, you would have to use the other link and start the video back from the beginning. It also forces you to create another page on the server, which does not take up much space, but is still an additional file to manage.
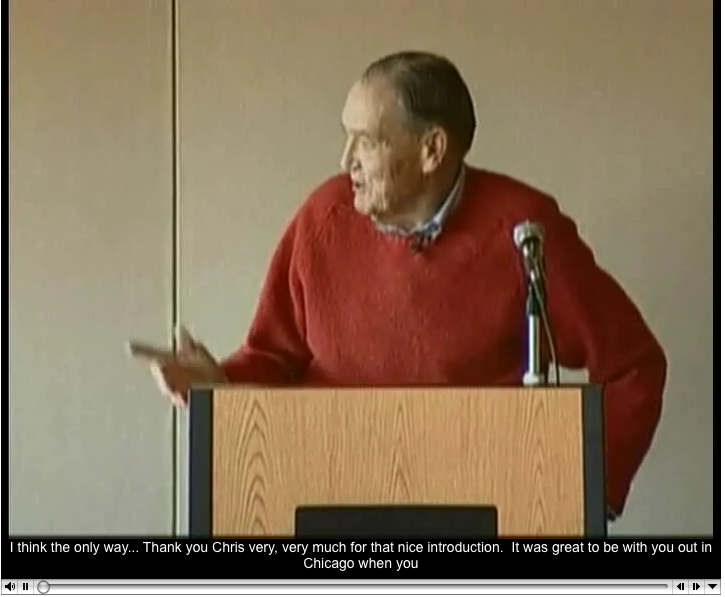
Figure 4: QuickTime video with captions added.
Embedded as a Layer
One last way that you can add captions is in the true closed-caption form. Figure 5 shows what the file would look like with true closed-captions. Adding true closed-captions will create an additional closed-caption layer. To add this layer you either must have a copy of Final Cut Pro for the use of Compressor or QuickTime Pro with the addition of a component file you can find on Apple’s web site. While using the QuickTime Pro method is cheaper, it involves a bit of a higher technical awareness to achieve. The other downfall to this method is that to add the closed-caption layer, the captions must be in a binary SCC format. The only programs available to create this type of file cost somewhere in the range of 00 to 00 and required the captions to be created and edited within them, which would mean that the initial transcript would be of little use. With this method, any time you would want to make changes or edits you would have to extract the layer back out of the video, make the edits, then repeat the process to insert the closed-caption back into the video.
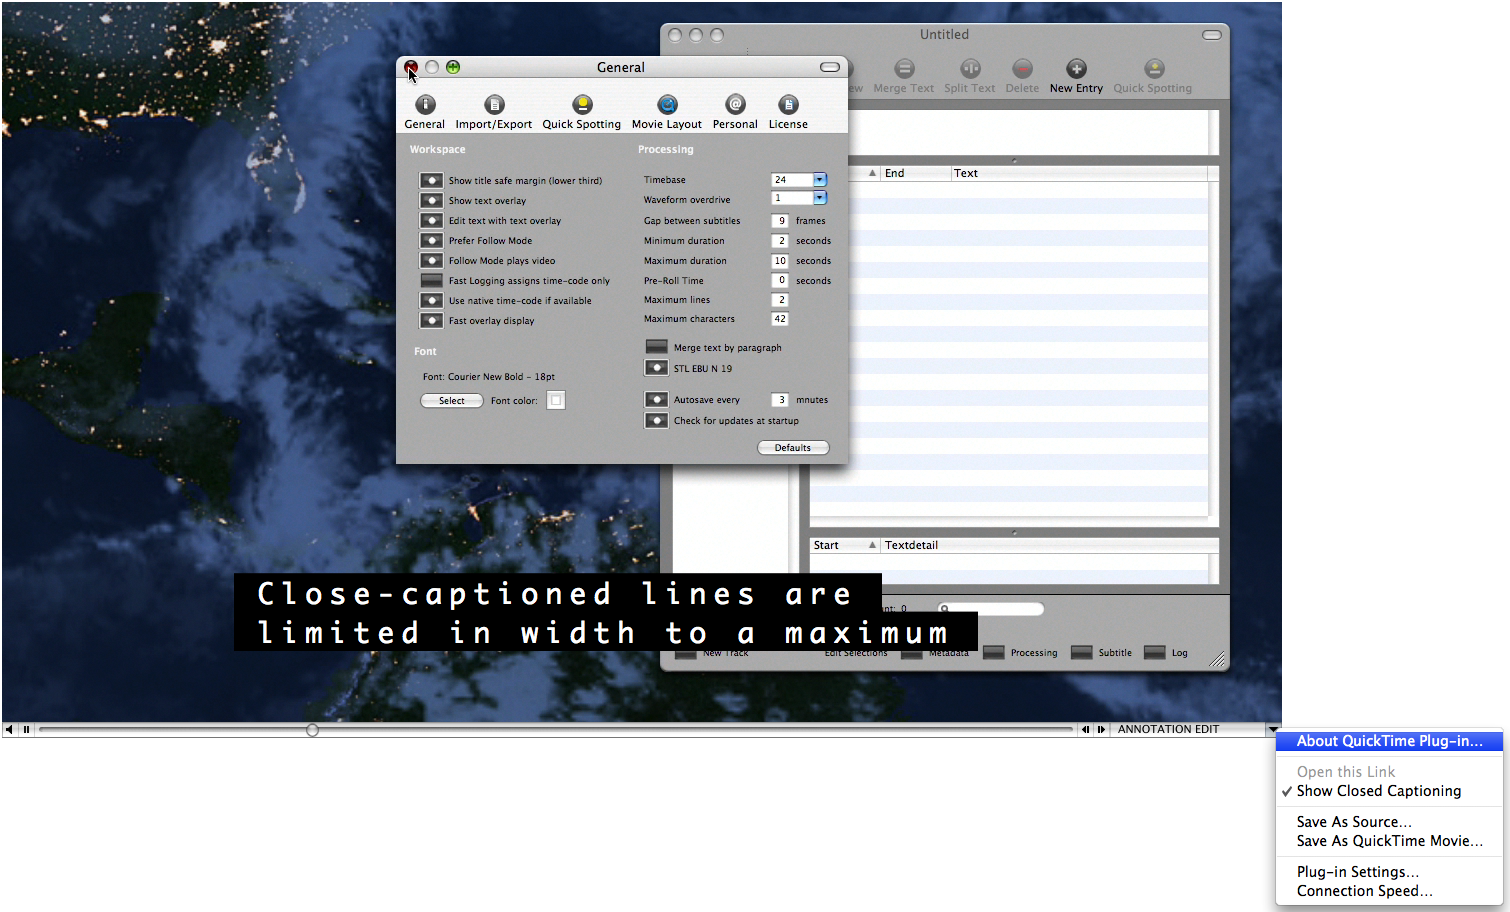
Figure 5: QuickTime video with closed-caption option enabled
Easy Captions Video example
This is an HRER video example.
Yikes! Your browser doesn't support Flash Player.
While you won't be able to watch the video in your browser, we've provided a transcript of the entire video so you won't be missing out on any important information.
Transcript - clickable!
Known bugs
- If the video isn't already playing, clicking on any part of the transcript will start the video from the beginning instead of playing the video from that point on.
- In its current state, the transcript is dynamically displayed on the page from the caption xml file, so it is NOT searchable.
Adapted from easyCaptions by Philip Hutchison, licensed under a Creative Commons license.