Main Content
Multimidia
Creating Captioned Videos for the Web
No matter which method of including captions you choose, the best thing to do is to start by creating a transcript if one is not already provided. Producing the transcript first will allow easy conversion into a caption based file in most cases and it is also easily edited when changes need to be made. The transcript can then be posted along with the video to provide better equity.
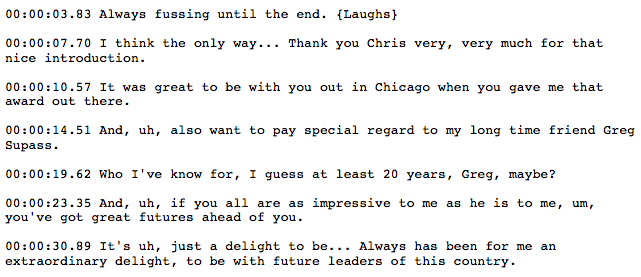
After creating the transcript, you will want to break it down into small sections that can be displayed on the video screen. Avoiding breaking sentences up when possible will help maintain cognition. The meaning may become more difficult to determine when a sentence is not displayed all at once. After splitting the transcript into smaller portions, you will want to go back through the video and add the timestamps to the beginning of each portion. This can be done manually using any video player. I used QuickTime Player version 7.6 and opened the Movie Inspector by clicking Window in the toolbar the Movie Inspector in the dropdown menu. This allowed me to see a more precise time down to the hundredth of a second. I played the video while following along with the transcript, pausing at the start of each section and added in the time in the following format: hh:mm:ss.ss; hh being hours, mm being minutes, ss being seconds (the second ss denotes the time down to the hundredth of a second). An example of my transcript with the time stamps can be seen below in figure 1. In each section I am going to assume that a transcript has already been created before starting.

Figure 1: Transcript with Timestamps
Another way to do this is to use the MovCaptioner software and play the clips of the movie and copy and paste the transcript into the application in the appropriate chunks. The reason I choose not to use this method was so that I had more control over where the captions would split from screen to screen. The third option it to go through an outside provider such as AutomaticSync.
