Main Content
Multimidia

Captioning QuickTime Video
Captioning a QuickTime video will be the first type I cover. There are three basic ways to caption QuickTime video, which are to add the captions to the video (hard caption), use a SMIL file (soft caption), or add a closed-caption layer to the video.
Using a TXT file (hard caption)
To add open captions to a QuickTime video you need to create a TXT file of the captions. This is done by putting your transcript with timestamps into a text file. You then add code to the beginning of the file that will tell the QuickTime Player how to handle the text file. An example of this file can be seen below in figure 2.
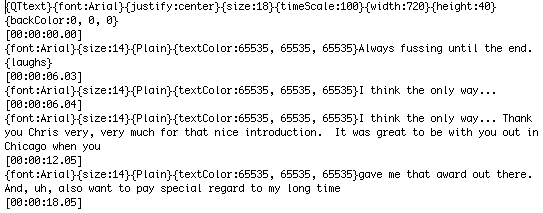
Figure 2: Caption text file for use with QuickTime
Once you have this file created you will have to open it with QuickTime Pro (as seen in figure 2.2) and merge it with the original video file. This process is fairly easy to complete and doesn’t require expensive software to achieve. If captioning is something that you will be doing often then you can keep a template text file so that you do not need to type in the beginning code each time.
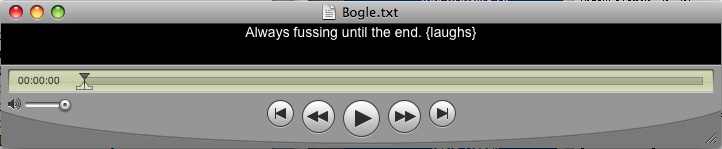
Figure 3: View of text file opened within QuickTime Player before merging.
Using a SMIL File (soft caption)
An alternative to merging the captions with the original video, you can create a SMIL file. A SMIL file is similar to a XML file with one specific purpose, to display captions. The SMIL file will combine the video with the captions as it is in use by simply telling the QuickTime Player, or browser plug-in, where both the video file and the caption file are located, and that it needs to combine them (see Figure 4). The files remain separate on the server side and you maintain your captions text file that may be edited or changed easily at any time. Still, this is not quite ideal, as you will get what would essentially be open captions. There is no button that will turn the captions on or off while watching the video. To get around this, you can create two separate links to view the video. One link would be to an html page with just the video imbedded. The other link would simply be directed to the SMIL file. Even this approach will not give you the ease of a button to turn the captions on or off. If you decide to view the captions a portion of the way through the video for any reason, you would have to use the other link and start the video back from the beginning. It also forces you to create another page on the server, which does not take up much space, but is still an additional file to manage.
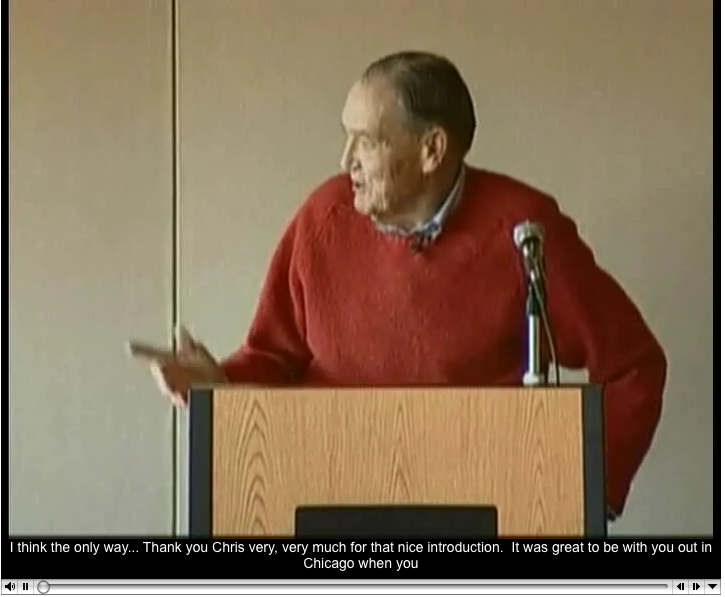
Figure 4: QuickTime video with captions added.
Embedded as a Layer
One last way that you can add captions is in the true closed-caption form. Figure 5 shows what the file would look like with true closed-captions. Adding true closed-captions will create an additional closed-caption layer. To add this layer you either must have a copy of Final Cut Pro for the use of Compressor or QuickTime Pro with the addition of a component file you can find on Apple’s web site. While using the QuickTime Pro method is cheaper, it involves a bit of a higher technical awareness to achieve. The other downfall to this method is that to add the closed-caption layer, the captions must be in a binary SCC format. The only programs available to create this type of file cost somewhere in the range of 00 to 00 and required the captions to be created and edited within them, which would mean that the initial transcript would be of little use. With this method, any time you would want to make changes or edits you would have to extract the layer back out of the video, make the edits, then repeat the process to insert the closed-caption back into the video.
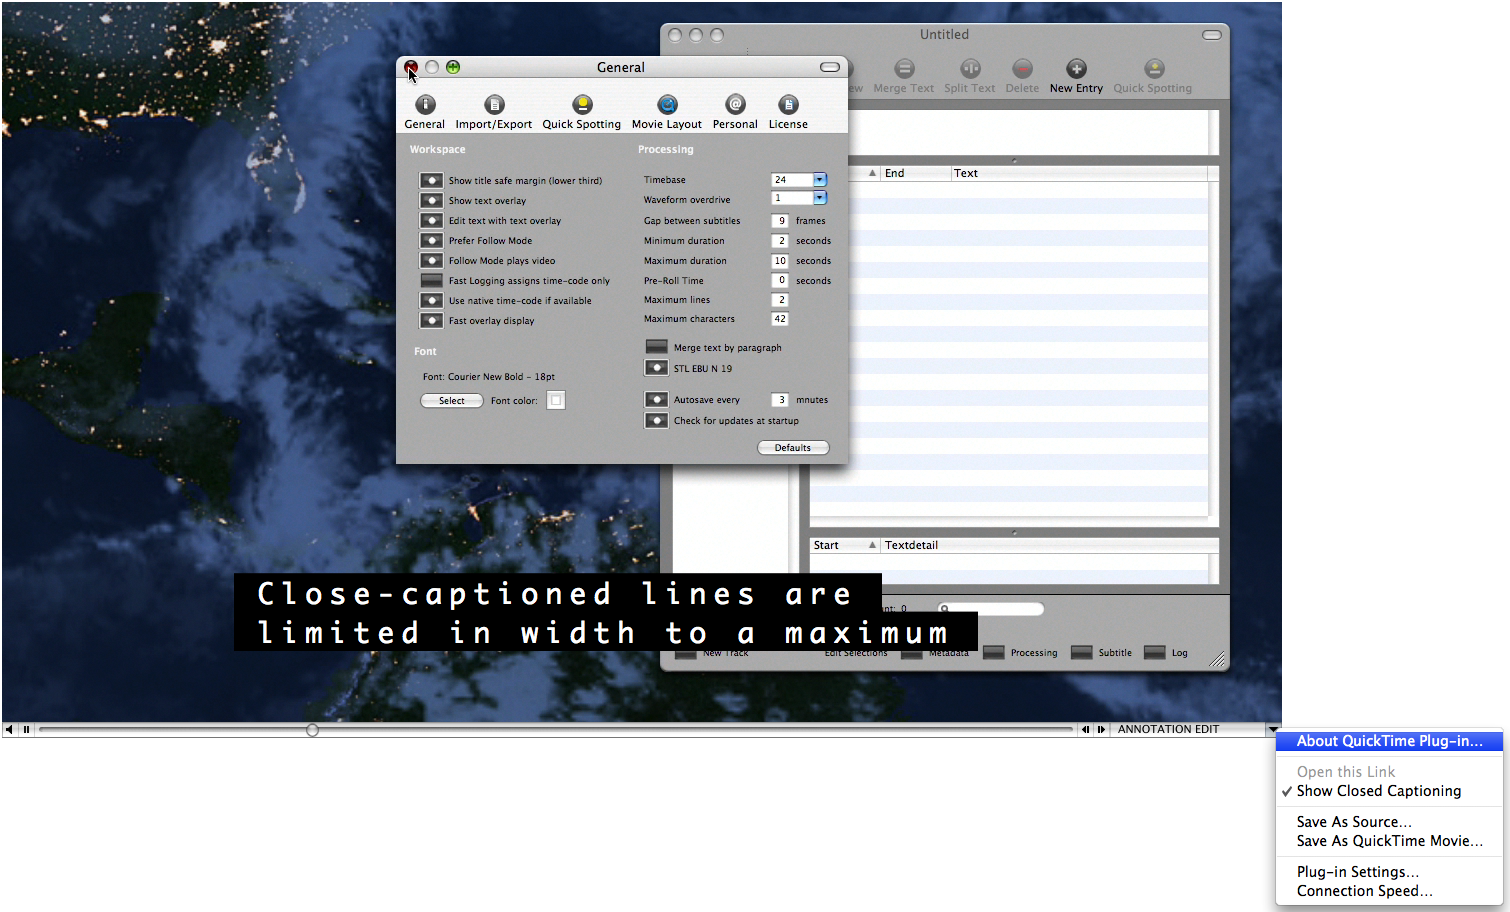
Figure 5: QuickTime video with closed-caption option enabled